 The Good Sign Company
Food-Truck Counter Display Guide
Best menu sign stands for food truck counters
The best menu stand fits a measured insert and presents it at the customer's actual order-point sightline without taking over the handoff counter. Compare the complete footprint, face angle, insert-loading method, surface glare, cleaning directions, and packed dimensions—not just the advertised paper size.
This guide covers portable, changeable holders used on a food-truck counter during service. It does not determine food-contact placement, vehicle suitability, outdoor performance, accessibility, or compliance; keep any display clear of the operating areas identified by the business and applicable requirements.
Disclosure: As an Amazon Associate, we may earn from qualifying purchases and approved partner referrals.
Category starting point
Match the complete stand to the counter—not only the menu card
Measure the insert and the usable counter rectangle. Then check the listing's complete width, depth, height, orientation, loading method, supported insert thickness, cleaning instructions, and packed shape.
Best stand formats by menu job
These are fit-based categories, not named winners or hands-on rankings.
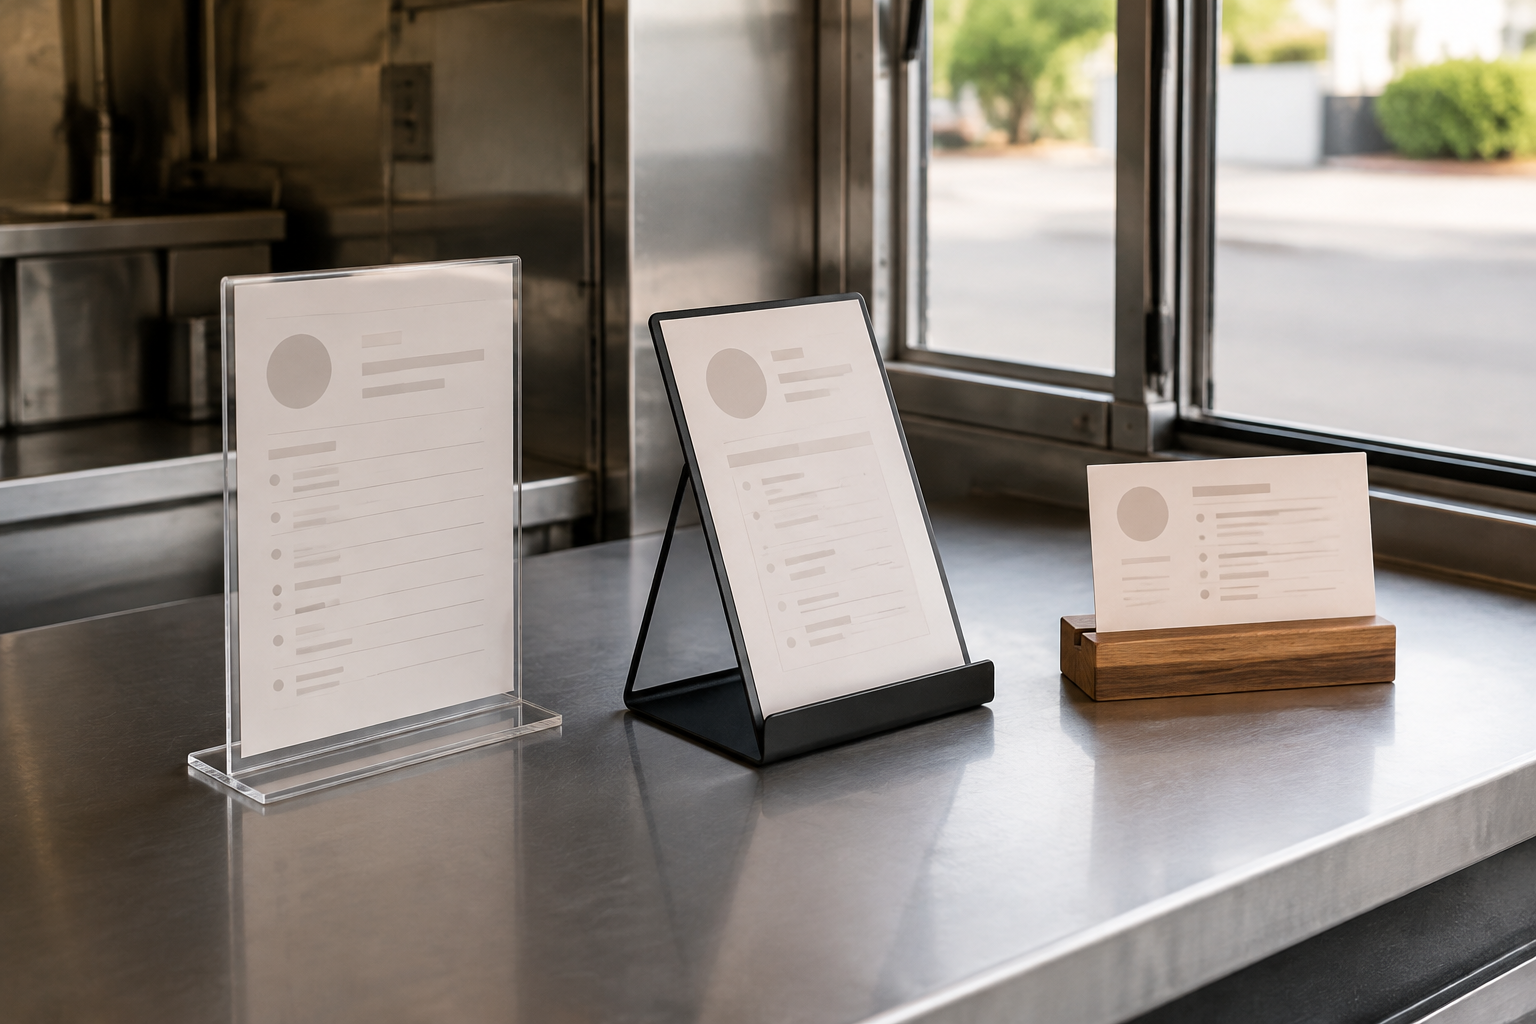
- Clear acrylic insert holders: best for a replaceable printed sheet. They can present a full page with minimal visual framing. Confirm the exact insert opening, visible area, base depth, loading direction, and manufacturer cleaning method; reflections can still affect the real service-window view.
- Angled metal stands: best for a lower counter and close ordering position. A tilted face can aim a short menu toward a customer standing nearby. Check the documented angle, lip depth, insert support, complete footprint, finish care, and whether the back projects into staff space.
- Slotted wood stands: best for a compact card with a warmer visual frame. Use the listed slot width and depth to confirm that the finished card sits securely and remains readable. A short base may pack easily, but the exposed card needs an appropriate cleaning and replacement plan.
- Double-sided holders: best when customers approach from two useful directions. Only choose a second face when both approaches genuinely matter. It adds another insert to update and may require a deeper base; the double-sided counter-sign worth-it guide helps test that threshold.
Eight checks before buying
- Map the service counter. Mark the areas needed for food handoff, payment equipment, a moving window, staff reach, and customer pickup before assigning any rectangle to a sign.
- Measure the finished insert. Record its physical width, height, thickness, and orientation. Confirm the holder's stated insert capacity and visible area.
- Measure the whole base. Product photos can understate depth. Compare the complete base with the usable counter rectangle and the space behind the sign.
- Test the customer angle. Mock up the face with cardboard, then view it from where a customer waits and orders. Check whether the counter edge or an open window blocks important lines.
- Protect the message edges. Keep names, choices, allergy-routing language, QR codes, and other essential copy away from lips, frames, and slot edges. Validate critical operating information through the business's responsible process.
- Check reflections during service. View the mockup under the light conditions that occur at the window. Repositioning or a simpler high-contrast insert may help more than changing holder material.
- Plan each menu change. Identify the loading direction, opening motion, and where the old and new inserts go. A front or side load is only convenient when nearby equipment leaves it accessible.
- Plan cleaning and pack-down. Follow current product instructions for the holder and the print. Record the packed dimensions and protect faces, edges, and inserts during travel rather than assuming one format tolerates a particular routine.
Build a useful insert before choosing the holder
A tabletop card works best for a short close-view task: a compact menu section, one special, an order cue, or one scan action. A dense core menu that customers must read before reaching the window usually needs a larger, earlier sightline. Start with the broader food-truck counter sign guide to separate approach, order, and pickup messages.
- Print the draft at final size.
- Place it at the intended height and angle.
- Read it from the realistic queue and order positions.
- Check it around the people and equipment normally present.
- Revise the message before buying a holder around an overcrowded sheet.
Who should skip a tabletop menu stand
- Skip it when the counter rectangle is needed for handoff, payment, or staff reach.
- Skip a small card when customers need the information before they arrive at the service window; use an earlier, larger menu position instead.
- Skip a fixed-size holder when the print format changes frequently or the insert does not match the documented opening.
- Skip a reflective face when repositioning and a real service-hour view still leave the menu difficult to read.
- Skip a general indoor holder where current instructions do not fit the actual exposure, movement, cleaning, or operating context.
- Skip any placement that conflicts with venue, vehicle, food-service, accessibility, electrical, or other requirements; confirm those issues with the responsible authority or qualified professional.
The practical bottom line
Choose the stand only after the menu card, customer sightline, and usable counter rectangle are defined. A clear insert holder suits a repeat paper size, an angled stand suits a close lower sightline, and a slotted base suits a small supported card—but the measured complete system decides the fit. Continue with the small-business sign planning guide when the menu stand is one part of a larger customer path.