 The Good Sign Company
Indoor sign-holder repair guide
Best replacement suction cups for lightweight indoor sign holders
The best replacement suction cup is not the largest cup in the pack; it is the one whose connector, dimensions, surface instructions, and manufacturer load guidance match the complete holder. Measure the old component and inspect every remaining part before buying. If the connector is uncertain or the holder is cracked, distorted, or incomplete, replace the whole assembly.
This guide covers replacement components for lightweight holders used on compatible smooth indoor surfaces. If you are choosing a complete display rather than repairing one, start with the suction-cup sign-holder guide.
Disclosure: As an Amazon Associate, we may earn from qualifying purchases and approved partner referrals.
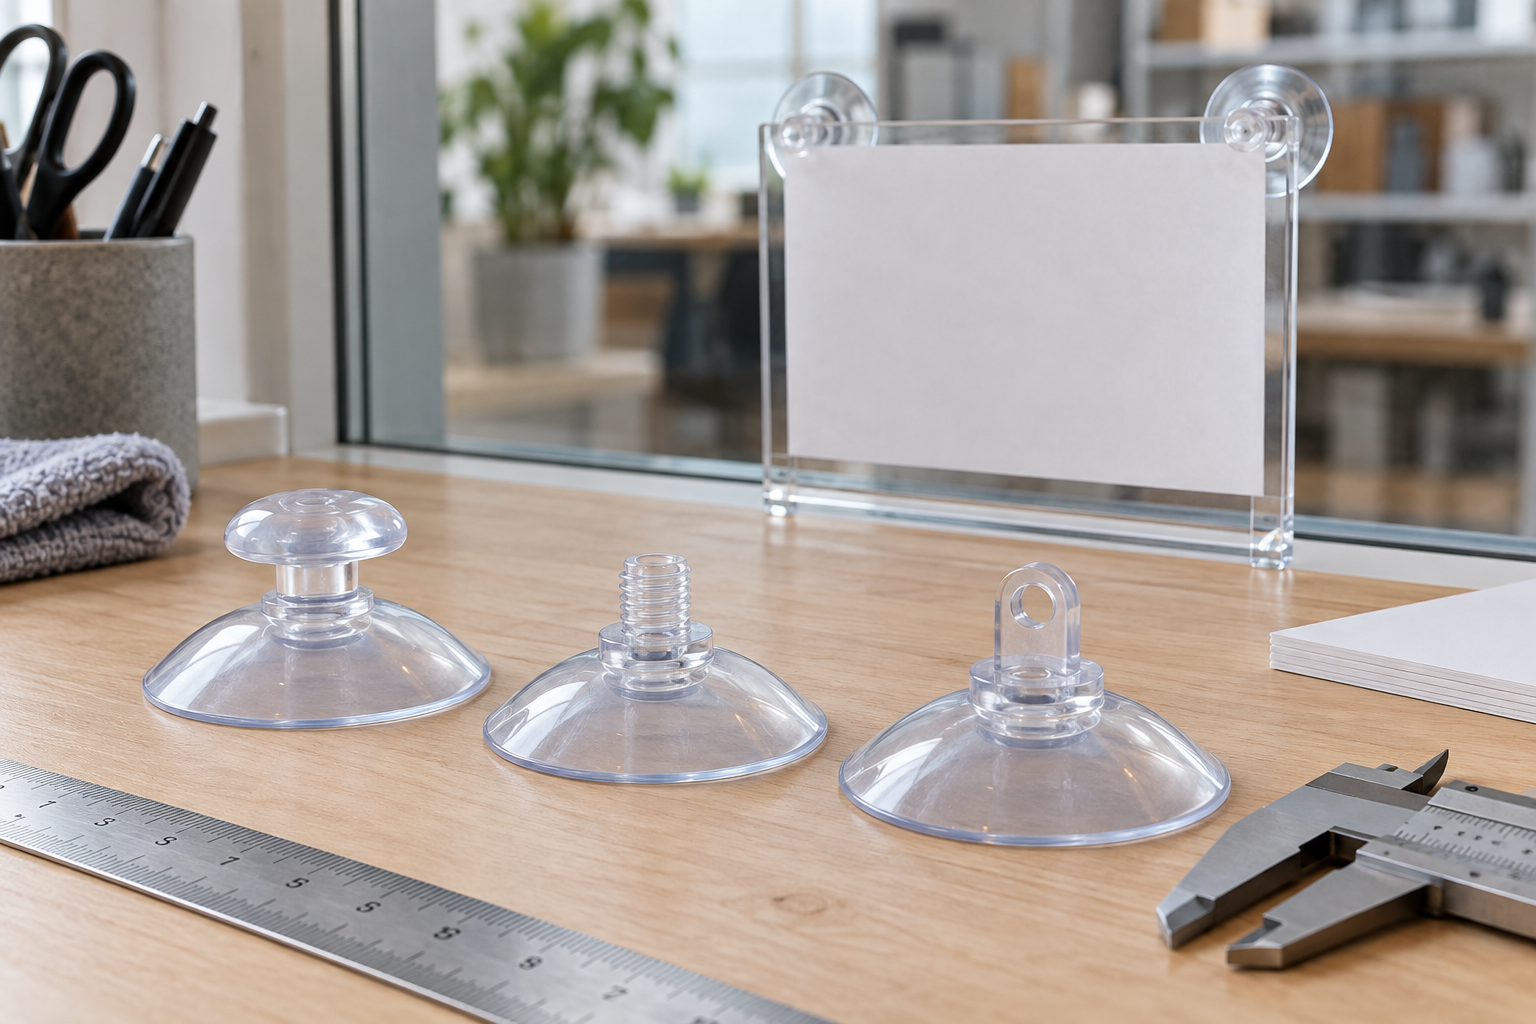
Compare replacement cups only after measuring the original
Search by the existing connector style and dimensions, then check the current listing for cup diameter, stem or thread measurements, material, compatible-surface guidance, installation instructions, manufacturer load limits, quantity, and included parts. A category image cannot prove fit.
Best replacement format by existing connector
These are compatibility categories, not named-product winners or hands-on rankings.
- Button or mushroom stem: best when the holder has a matching keyhole-style receiver. Measure the head, neck, and stem length; a visually similar button can still be too loose or too large.
- Threaded stem: best when the original assembly uses a confirmed thread. Match thread diameter, pitch, usable length, and any washer or nut arrangement. Do not force an uncertain thread into acrylic or plastic.
- Eyelet or hole connector: best for a documented hook, pin, or clip interface. Confirm the hole diameter, surrounding thickness, and connector clearance as one system.
- Hook-equipped cup: best when the separate sign already has a compatible hanging point. Check hook opening, orientation, complete sign weight, and whether movement could let the sign jump free.
- Complete matched holder: best when the old connector cannot be identified. A new documented assembly is the safer buying route when parts are missing, worn, modified, or dimensionally ambiguous.
Build a replacement specification before shopping
Photograph the old cup beside a ruler before removing it. Record the cup's outside diameter, overall height, connector type, stem diameter and length, thread details if applicable, and every washer, cap, clip, or nut in the stack. Measure the holder opening independently rather than assuming the worn part preserves its original shape.
Also document the complete display: holder material, sign dimensions, finished weight, number and spacing of cups, orientation, glass location, and whether the assembly sits on a fixed pane or moving door. The cup is only one link in that system.
Comparison framework
- Identify the holder maker or original part first. An exact replacement from the system maker is the clearest route when available.
- Match connector geometry. Compare every relevant diameter, length, thread, opening, shoulder, and retaining part.
- Verify the intended surface. Read current instructions for glass type, smoothness, coatings, films, preparation, temperature, and indoor-use limits.
- Use the complete display load. Include the sign, insert, pocket, clips, and connector parts—not only the paper message.
- Check cup layout and access. Confirm spacing, orientation, edge clearance, door hardware, and a practical way to release the cup without damaging the holder.
- Compare maintenance instructions. Look for preparation, application, removal, cleaning, reapplication, and inspection guidance from the selected maker.
- Trial one complete assembly. Follow the product instructions, keep the area below clear, and remove the display if a cup loosens, deforms, clouds, cracks, or no longer matches the stated conditions.
Do not treat cup diameter as a strength ranking
A wider cup is not automatically suitable for a heavier sign. Holding guidance depends on the product, connector, surface, preparation, environment, cup count, load direction, and condition of the whole assembly. Compare only current manufacturer information that applies to the exact configuration.
Avoid mixing an undocumented replacement cup with an old holder and then relying on a generic load claim from either component. If no source documents the combined setup, choose a complete holder with instructions that cover the intended indoor surface and finished sign.
Inspect the holder, not only the failed cup
Check acrylic pockets for cracks around holes and edges. Inspect clips, hooks, fasteners, and connector seats for wear, bending, missing retainers, or stress whitening. Confirm that the sign still hangs level and does not interfere with frames, handles, blinds, cleaning equipment, or the normal movement of a door.
If several cups have aged together, replacing one may leave the rest as the weak point. Decide whether a matched set or a complete new holder creates a more understandable inspection routine.
Who should skip replacement cups
- Skip component repair when the connector cannot be positively identified and measured.
- Replace the complete holder when acrylic, clips, hooks, or fasteners are cracked, distorted, corroded, modified, or incomplete.
- Use another display method where the glass is textured, damaged, curved, filmed, coated, or otherwise excluded by current product instructions.
- Skip suction cups for exterior, overhead, emergency, required safety, or other high-consequence signs.
- Avoid them where a release could block a route, strike a person, damage merchandise, or interfere with a moving door.
- Do not use this product guide as approval for accessibility, lease, landlord, code, or safety requirements.
Alternatives when the match is uncertain
A freestanding counter holder avoids dependence on glass. Static cling can suit a short-lived flexible message when its printing, application, and removal instructions match the pane. A clamp-on holder may fit a measured counter or partition edge. Compare suction cups and static cling or clamp-on and suction-cup holders before committing to a repair that does not fit the display job.
Bottom line
Choose a replacement suction cup in this order: exact original part when available, matched connector geometry, product-specific surface guidance, applicable load information, and a manageable inspection routine. If any link remains uncertain, replace the complete lightweight holder or move the message to a different display method.
Continue with the sign mounting supplies pillar for other mounting routes or the complete suction-cup holder guide when repair is no longer the cleanest choice.