 The Good Sign Company
Retail fixture comparison
Gridwall Sign Holder vs Slatwall Sign Holder
Start with the display fixture, not the sign-holder style. A gridwall holder must match the panel's wire geometry; a slatwall holder must match the groove and any insert profile. Once compatibility is confirmed, compare card size, viewing angle, projection, update access, and how the hardware travels.
Disclosure: As an Amazon Associate, we may earn from qualifying purchases and approved partner referrals.
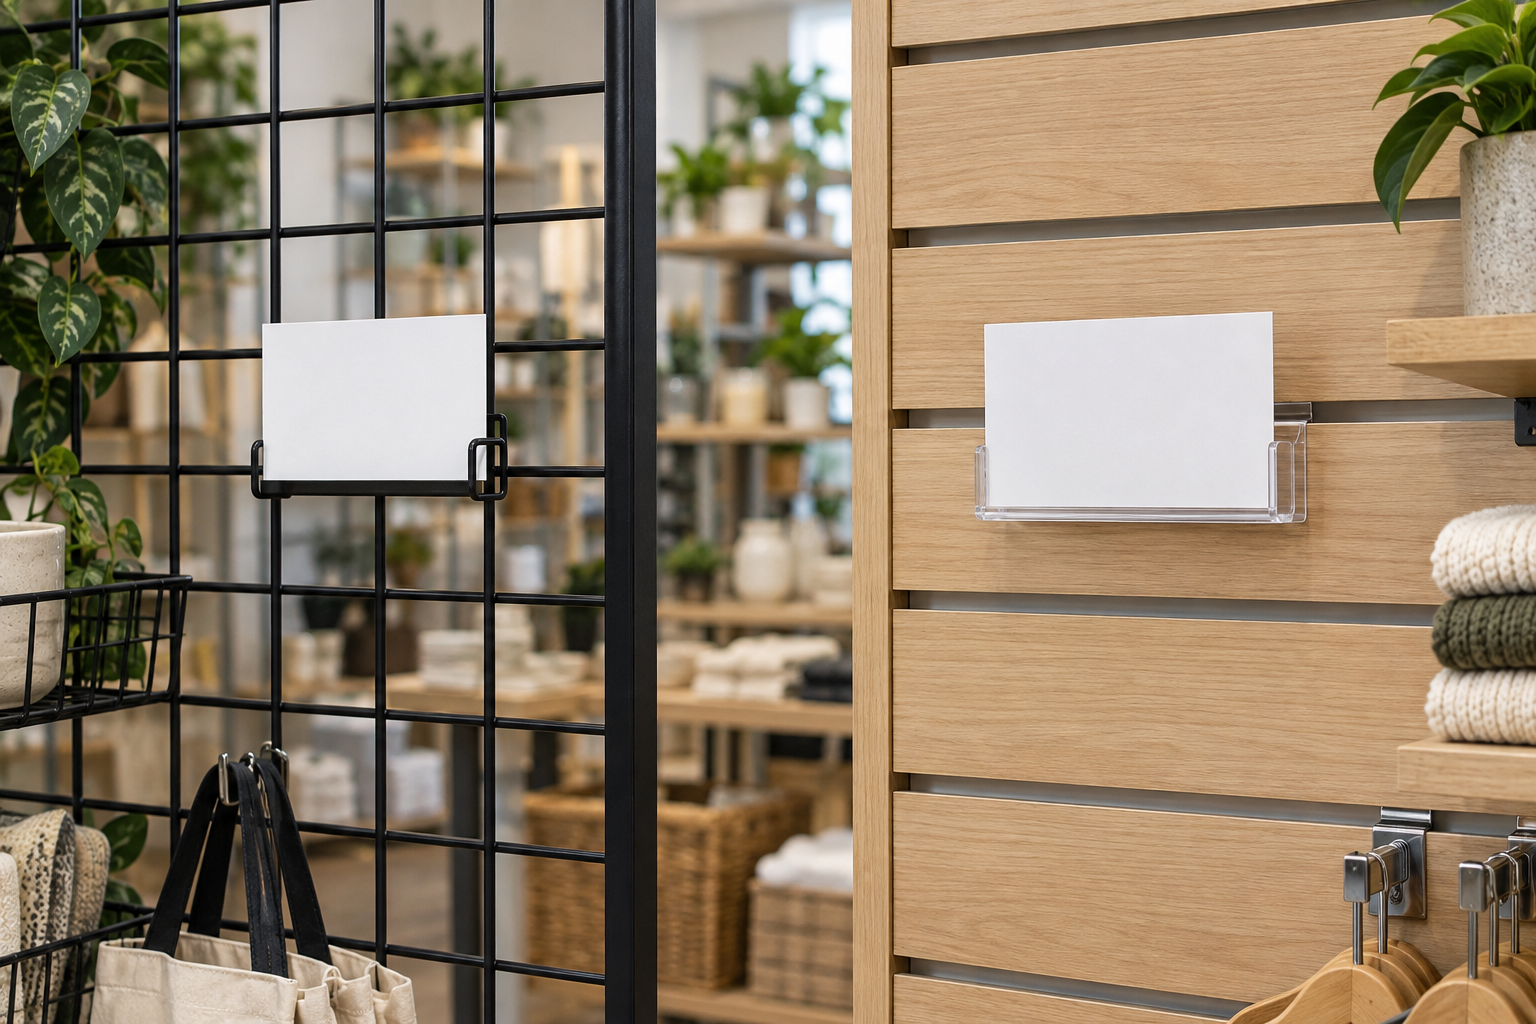
Compare holders for the fixture you have
Check the fixture maker's compatibility notes and measure the actual panel before ordering. Then verify the holder's attachment, insert dimensions, orientation, and complete projection.
The short answer
Choose a gridwall holder when the display is an open wire-grid panel and the product explicitly matches its rod or grid geometry. It suits a fixture whose open cells and attachment points are part of the merchandising layout.
Choose a slatwall holder when the display uses horizontal grooves and the holder's bracket or adapter is documented for that exact slatwall construction. It can keep the attachment visually integrated with other groove-mounted accessories.
Choose neither if you cannot identify the fixture system or verify its dimensions. A freestanding tabletop holder or a sign clipped to a confirmed compatible shelf edge is a safer buying path than assuming similar-looking hardware will fit.
Decision table
| Decision | Gridwall holder | Slatwall holder |
|---|---|---|
| Host fixture | Open wire-grid panel | Panel with horizontal grooves or channels |
| First measurement | Rod diameter and grid spacing at the mounting point | Groove profile, spacing, and any insert or adapter |
| Attachment check | Hook, clip, bracket, or wire engagement | Tab, bracket, adapter, or groove engagement |
| Repositioning | Moves among confirmed grid positions | Moves along or between compatible grooves |
| Visual effect | Hardware sits against an open grid | Hardware emerges from a horizontal panel line |
| Main mistake | Assuming all wire panels share one geometry | Assuming every slotted panel accepts the same bracket |
1. Identify the host system before shopping
Photograph the full fixture and the proposed attachment point. For gridwall, measure the center-to-center spacing between wires and note the wire shape and diameter. For slatwall, identify the panel or insert documentation when possible and record the groove spacing and profile. A product title alone is not evidence of fit.
If the display came with shelves, hooks, or bins, look for a manufacturer name or part reference on those components. Matching within the documented accessory system can be more reliable than comparing appearance in product photos.
2. Inspect how the holder engages
A gridwall holder may hook over a horizontal wire, wrap a rod, or engage more than one part of the grid. A slatwall holder may use a shaped metal tab, a plastic adapter, or a bracket made for a particular groove. Compare the product's attachment close-up and instructions with the real fixture.
Do not infer holding capacity from a thick bracket or a tight-looking product photo. Use the manufacturer's stated use and limits for the complete combination, including the sign face and any stem.
3. Measure the card and complete projection
Record the finished card width and height, not just the paper size before trimming. Check whether the holder grips an exposed card, carries a clear pocket, or accepts an insert behind a face. The loading direction matters when merchandise, shelves, or adjacent holders limit access.
Measure from the fixture face to the front edge of the complete holder. A projecting stem can improve a sightline but also intrude into reach space, conflict with hanging products, or make packing awkward. Test the proposed outline with a paper or cardboard mockup.
4. Match orientation to the message
A narrow price card, wider category card, and square QR prompt do not use the same layout. Confirm portrait or landscape orientation, the visible area, and whether the card can rotate. Keep the type large enough for the actual viewing distance, with the price or category as the first visual cue.
For a QR code, test the final printed card on the installed fixture with multiple phones and realistic lighting. Provide a readable text fallback; the holder format cannot guarantee a scan.
5. Plan changes and transport
For a permanent retail wall, consider whether staff can replace cards without removing merchandise. For a market display, count the loose holders, choose a labeled container, and check whether projected stems should be removed before packing. A holder that fits the panel but snags during transport creates avoidable setup work.
Standardize a few card sizes and keep the editable templates with the fixture inventory. Consistent inserts reduce trimming and alignment work across repeated setups.
When to skip both
- The fixture type, dimensions, or manufacturer compatibility cannot be confirmed.
- The holder would project into a customer path or interfere with merchandise access.
- The message changes format so often that one insert size will become restrictive.
- The fixture belongs to a venue or landlord and attachment rules are unknown.
- A tabletop holder or confirmed shelf-edge clip would create a clearer, simpler sightline.
Buying checklist
- Fixture brand or system name, when available
- Grid spacing and rod geometry, or slatwall groove profile and spacing
- Close-up of the holder's attachment mechanism
- Manufacturer compatibility statement
- Insert size, visible area, orientation, and loading direction
- Complete projection from the fixture face
- Clearance from merchandise and customer reach paths
- Update, removal, packing, and storage routine
Continue the display decision
Use the small-business sign planning guide to connect the message, viewing path, update owner, and fixture plan. If the fixture is a confirmed gridwall panel, compare gridwall sign-holder formats for market displays by attachment, insert fit, projection, angle, and packing. If the actual host is wire shelving rather than a gridwall panel, use the wire-shelving sign clip guide. If the sign can stand independently on a counter, compare a clip-on holder with a weighted base.