 The Good Sign Company
Acrylic Sign Mounting Comparison
Standoff mounts vs edge-grip mounts: choose before the acrylic sign is made.
Through-hole standoffs pass through prepared holes in a compatible acrylic panel. Edge-grip mounts hold a compatible undrilled panel at selected edges. That difference affects the panel drawing, hardware placement, visible face, alignment, and later removal—so settle the mounting format before ordering the finished sign.
Disclosure: As an Amazon Associate, we may earn from qualifying purchases and approved partner referrals.
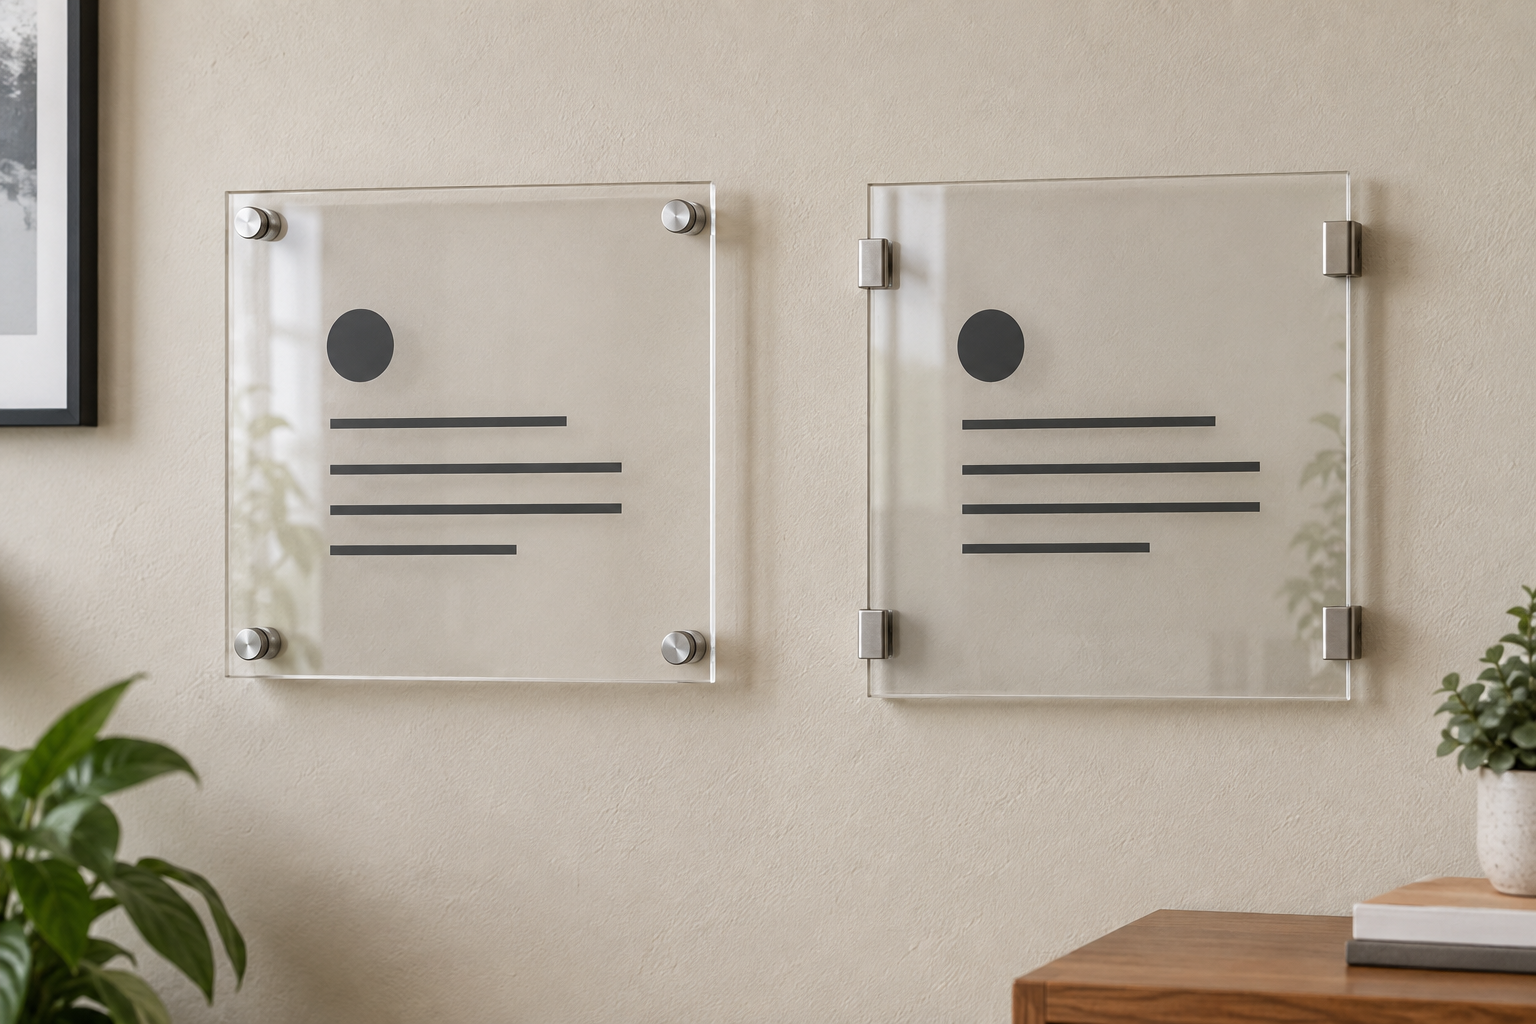
Compare both hardware routes
Match the panel and hardware as one system.
Document the finished panel thickness, dimensions, weight, holes or usable edge area, wall offset, mounting points, wall construction, and removal access. Keep only hardware whose current instructions cover that complete arrangement.
The short answer
- Choose through-hole standoffs when the panel maker can prepare holes that match one documented hardware system and visible face caps suit the design.
- Choose edge-grip mounts when a compatible undrilled panel fits the maker's stated thickness, engagement, orientation, and retention requirements.
- Choose neither yet when the finished panel, mounting-point layout, wall substrate, fasteners, or complete-system guidance is unknown.
The decision starts with panel preparation
Through-hole hardware commits the panel to a layout
Hole diameter, spacing, distance from the edges, and panel thickness must agree with the selected hardware and the panel maker's drawing. The caps become visible elements on the sign face. Do not use a generic article to drill, enlarge, or relocate holes in finished acrylic.
Edge grips preserve an undrilled face but still impose limits
An edge-grip mount avoids holes through the sign face, but “no holes” does not mean universal fit. The hardware still needs a documented panel-thickness range, enough compatible edge engagement, the required orientation and quantity, and a retention method that matches the installed arrangement.
Neither option solves the wall connection by itself
The panel-side fit and wall-side attachment are separate checks. Identify the actual wall construction and concealed conditions, then follow the hardware instructions for fastener selection and placement. Included screws or anchors are not proof that a kit fits every wall.
Comparison at a glance
| Decision | Through-hole standoffs | Edge-grip mounts |
|---|---|---|
| Panel preparation | Requires matching prepared holes | Requires compatible clear edge areas and thickness |
| Visible hardware | Caps appear on the sign face | Clamps interrupt selected edges |
| Alignment | Panel holes and wall points must agree | Clamp positions, engagement, and panel alignment must agree |
| Graphic planning | Keep important content clear of caps and holes | Keep important content clear of clamp zones |
| Removal | Caps are accessed while the panel is supported | Clamps are released as directed while the panel is supported |
| Main stop sign | Unknown or mismatched hole geometry | Unknown thickness, engagement, or retention |
Measure these facts before shopping
- Finished panel: record width, height, thickness, material specification, and verified finished weight.
- Prepared features: for through-hole hardware, get the hole diameter, center locations, and edge distances; for edge grips, document usable edges and any finish or graphic layer in the contact zones.
- Hardware geometry: compare barrel or clamp dimensions, wall offset, cap or jaw shape, quantity, panel-contact parts, and access needed to assemble it.
- Published compatibility: read the current instructions for panel range, orientation, spacing, retention, and complete configuration. Do not combine similar-looking parts unless their documentation permits it.
- Wall-side plan: identify the wall assembly, mounting-point locations, compatible fasteners, nearby utilities, trim, and clearance.
- Service plan: leave room to support, clean, remove, and reinstall the panel without forcing or flexing it.
When through-hole standoffs are the clearer fit
Use this route when the sign is still being fabricated, the panel maker can coordinate the hole drawing with the selected hardware, and the face caps belong in the visual design. Fixed holes make the intended mounting positions explicit, but they also leave little tolerance for a mismatched template or wall layout.
Skip this route if the finished panel lacks the required holes, if hole geometry is undocumented, or if the artwork conflicts with cap positions. If you have already chosen this format, compare products with the standoff mounts for acrylic signs guide.
When edge-grip mounts are the clearer fit
Use this route when an undrilled acrylic face is important and a specific mounting system explicitly covers the panel thickness, clamp orientation, engagement, quantity, and retention plan. The clamps remain visible along the perimeter, so place them deliberately around the artwork and any polished edges.
Skip this route when the panel is outside the stated range, the clamp would contact an incompatible finish or graphic, engagement cannot be achieved, or the instructions do not explain how the panel is retained in the intended orientation.
Mock up the visual difference
Print the sign artwork at full size or mark its outline on paper. Add circles where through-hole caps would sit, then add blocks where edge clamps would interrupt the perimeter. Tape the mockup at the planned wall height and view it from the doorway, desk, or customer approach. Include the full wall projection so nearby trim, doors, furniture, and circulation are not overlooked.
If the sign format itself is still open, compare French cleats and standoff mounts; that decision is about concealed rear support versus visible point mounting rather than two ways to hold an acrylic panel.
Stop criteria and safer alternatives
- Stop when seller photos are the only evidence for panel fit, spacing, capacity, or installation.
- Stop when the sign maker and hardware instructions specify different hole, thickness, edge, or contact requirements.
- Do not infer complete-system suitability from the rating of one component.
- Pause before drilling where the wall construction or concealed utilities are uncertain.
- Use an appropriate installer for heavy, valuable, overhead, powered, exterior, code-sensitive, or otherwise high-consequence signs.
- Consider a compatible tabletop holder when wall holes, uncertain substrate, frequent relocation, or service access makes fixed mounting a poor fit.
Verdict
Choose through-hole standoffs when a new acrylic panel can be prepared to one verified hardware drawing and face caps suit the artwork. Choose edge-grip mounts when keeping the panel undrilled matters and one documented system matches its thickness, contact zones, orientation, and retention needs. In either case, resolve the panel-side fit and wall-side attachment before ordering either component.
Continue with the mounting pillar for the full wall plan, or compare hollow-drywall mounting options only after the mounting points and wall construction are confirmed.