 The Good Sign Company
Indoor Sign Mounting Comparison
French cleat vs standoff mounts: which system fits your indoor sign?
A French cleat supports a compatible rigid sign from behind, keeping most hardware out of view. Standoffs connect a compatible panel at several visible points and deliberately create a gap from the wall. The choice starts with how the sign was built—not with which hardware finish looks best.
Disclosure: As an Amazon Associate, we may earn from qualifying purchases and approved partner referrals.
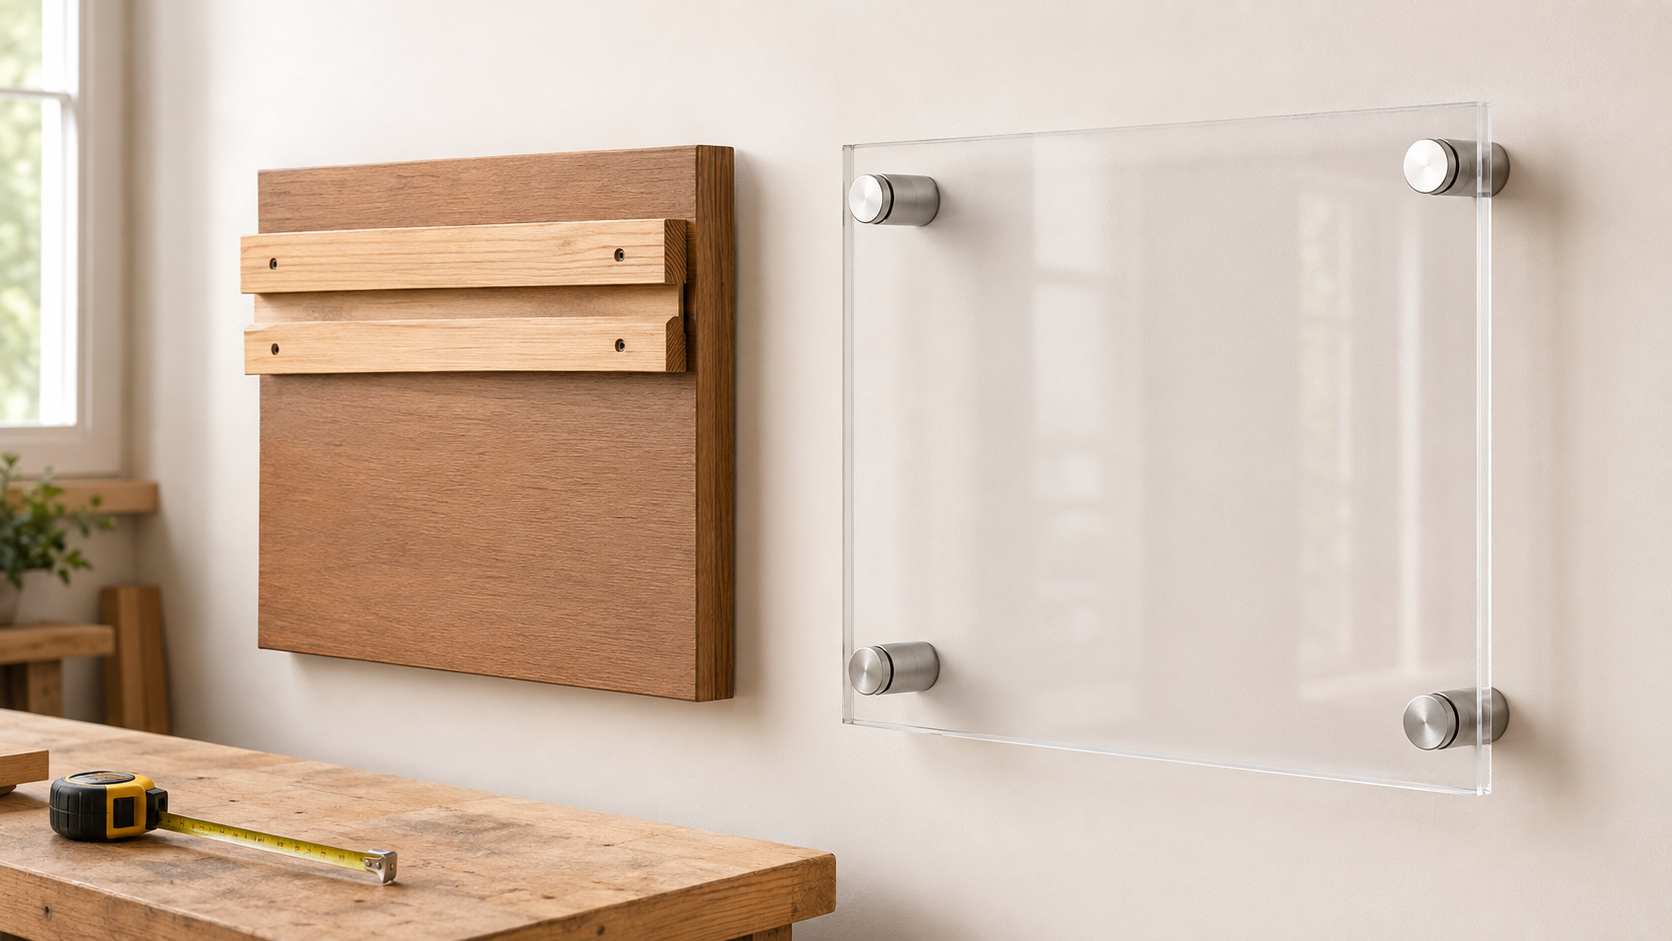
Compare both hardware routes
Match the mount to the finished sign before shopping.
Record the sign material, finished weight, back structure or panel holes, wall substrate, projection, and removal clearance. Then compare only hardware whose current instructions cover those known conditions.
The short answer
- Choose a French cleat when the rigid sign has a confirmed structural attachment area on its back, concealed hardware suits the design, and there is room to engage and later lift the sign.
- Choose standoffs when a compatible panel has the required holes or edge-grip arrangement, visible caps suit the design, and an intentional wall gap is useful.
- Choose neither yet when the sign weight, construction, wall substrate, hidden conditions, fasteners, or maker instructions are unknown.
What changes between the systems?
Sign construction comes first
A cleat needs a rigid, suitable area where its sign-side rail can attach. A thin, hollow, flexible, cracked, or unknown back is not automatically compatible. Through-grip standoffs need panel holes that match the hardware geometry; edge-grip versions need a stated panel-thickness range and retention method. Do not add or enlarge acrylic holes from a generic guide.
Hardware visibility and wall profile
A cleat is usually concealed once the sign is engaged, though the sign may still stand away from the wall by the combined rail depth and any lower spacer. Standoff caps remain visible on the face or edges and their barrels create a deliberate shadow gap. Check the complete side profile with a cardboard mockup, especially beside trim, doors, switches, or narrow paths.
Alignment and service access
A compatible cleat may allow some side-to-side positioning before any specified anti-lift restraint is installed. Removal normally requires upward clearance. Standoffs establish several fixed points, so hole layout, wall marks, and leveling must agree. Their caps also need future access while someone supports the panel as directed.
Cleaning and changing the sign
A cleat can allow the complete sign to come off for access when the design and clearance permit. A standoff panel may require multiple caps to be removed while the panel is supported. Follow the sign and hardware makers' care instructions; do not assume a cleaner suitable for metal, wood, or a painted wall also suits acrylic.
Compatibility checklist before buying
- Get the finished sign dimensions and verified weight from its maker or measure them appropriately.
- Identify the sign material and structural attachment area, or document panel thickness, holes, edge distance, and hole spacing.
- Identify the actual wall assembly and the locations where attachment points would land.
- Compare the exact hardware instructions, included pieces, fastener arrangement, and stated compatibility—not a category photo or headline claim.
- Mock up the finished wall projection plus lift-on or cap-access clearance.
- Plan bottom spacing, cable or service access, and any maker-specified restraint as part of the complete system.
- Pause for an appropriate installer when the wall, sign structure, fastener path, or consequence of failure is uncertain.
When a French cleat is the clearer fit
A cleat is a practical candidate for a rigid wood, framed, or otherwise compatible sign whose maker confirms a structural mounting zone. It supports a clean face because the attachment stays behind the sign. It can also suit a sign that should be removable as one unit, provided the planned position leaves enough vertical clearance and the complete system follows current instructions.
Skip the cleat route when the back cannot accept its sign-side fasteners, the rails cannot engage fully, ceiling or trim blocks removal, or wiring, vents, labels, or access panels occupy the same space. Decide first whether a French cleat is warranted for the measured heavy indoor sign; once it is, the French cleat kit guide explains rail length, engagement, back construction, and documentation.
When standoffs are the clearer fit
Standoffs are a practical candidate for a compatible acrylic, metal, or other rigid panel when the mounting points are part of its design and visible hardware supports the intended look. The barrel depth makes the wall gap predictable, while cap size and finish become part of the sign face.
Skip through-grip standoffs when their required holes do not match the finished panel. Skip edge-grip versions when the stated panel range or retention arrangement does not match. A deep projection may also be awkward where people or objects can brush the panel. Use the acrylic sign standoff guide to compare hole fit, barrel geometry, panel protection, and access.
Stop criteria and alternatives
- Do not use a seller's included fasteners as proof that every wall is compatible.
- Do not transfer a capacity statement between different rail lengths, fasteners, substrates, panel layouts, or installation conditions.
- Pause before drilling where concealed utilities or the wall construction are uncertain.
- Use an appropriate installer for heavy, valuable, overhead, powered, exterior, or other high-consequence signs, and for positions above beds, seats, work areas, or busy routes.
- Consider a tabletop stand or floor easel when wall holes, wall condition, or later relocation make either fixed system a poor fit.
Verdict
Choose a French cleat for a compatible rigid sign that benefits from concealed rear support and can provide full rail engagement plus removal clearance. Choose standoffs for a compatible panel designed around fixed mounting points, visible caps, and a deliberate wall gap. If the sign construction or wall facts do not clearly support one route, resolve those facts before buying hardware.
Next, use the mounting pillar to plan the wall connection or the hollow-drywall guide when confirmed attachment points land away from solid framing.